
Pictures of my felted scarves are available at my Instagram
My ETSY online shop offers a wide selection of felted scarves. I'll be happy to answer any of your questions.
More pictures any information are available at my Tonya Utkina Facebook page.
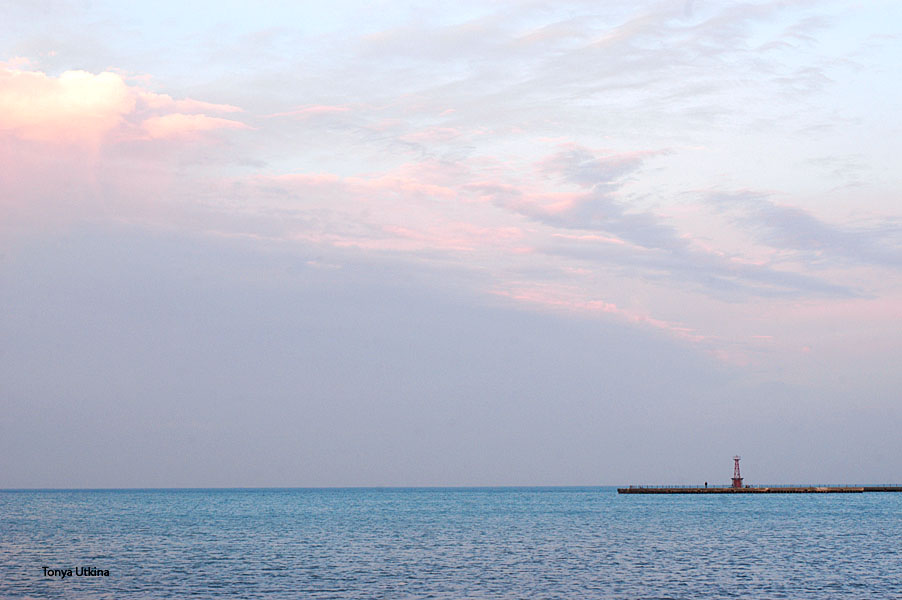
While waiting for my son to finish his soccer practice I took a few pictures of Lake Michigan at sunset. Beautiful lake it is!

This place is called Montrose beach at Lake Michigan.

They have a small space designeted as a nature area with birds and insects one will not see in other places.

Amazing needle felted miniature birds and animals by Natasha Belova. Each felted animal is a brooch and could be pinned to a jacket or a coat. The colors are amazing and the craftsmanship is of the highest order. All these pins and brooches could be great small gifts for your loved ones. In addition to pins Natasha makes toys. Each toy is needle felted of wool and other natural fibers and has a personality of its own.

Could you please tell us a bit about yourself?
My name is Natasha and I live in a small city Zhukovsky in Russia. I work as a graphic designer in a local company. I've always loved to create with my hands. When I was in my twenties I used to sew and paint. I've discovered the magical world of felting many years ago and have been experimenting with felting ever since. I've started hand making small needle felted toys and pins about three years ago. They were small gifts for dear friends at first. Later, I began selling my felted animals at shows and through local shops.

In 2014 I've finally decided to open my Etsy shop znmystery. When I have free time (mostly after work) I make miniature bird and animal pins and brooches.

What are your main sources of inspiration?
I always get inspired by nature that offers such a wide variety of species in all shapes and colors. Nothing can compare to the world around us! My owls, finches, hedgehogs, rabbits have all been modeled on amazing birds and animals that live in nature. I try to spend as such time outside as possible. I love to travel, to take strolls in local forests and parks. I'm into mushroom picking that is quite popular in my region. I use only natural and organic materials for my pins, brooches and toys. Wool, silk, cotton, linen are an integral part of nature. By using them I try to pass a small part of nature on to whoever buys my birds and animals.

Just discovered this nice dog beach in Chicago. One can tell how much fun all these dogs have running around the beach. It's located next to Montrose Beach on lake Michigan and is supported by an non-profit organization. Volunteers keep it clean and neat. The beach is listed as one of the best dog parks in the country.

Inspired by the cool breeze and nice weather I came home and created a pale blue and gray hand felted scarf. Since I leave not too far from the lake now it looks like it will be my prime source of inspiration.

We had wonderful time at the 2nd Annual Christkindlmarket at Travelers Rest Farm in Virginia. The market was set up in an old barn and had a very distinctive European feel. A traditional Christkindlmarket is basically a holiday market set up in a typical European village with its timber houses, decorated Christmas trees and snow. Virginia 2nd Annual Christkindlmarket was very much a traditional festive event. We didn't have snow this time around though.
The list of all the vendors can be located at Christkindlmarket Virginia 2nd Annual.


We will felt a few cute pumpkins for Halloween. Our pumpkins could be great gifts for friends and family. They will look wonderful in your living room or your kitchen as signs of beautiful Autumn and approaching Halloween.

We will need some orange felting wool, a glass of water and a piece of soap, black thread and a needle. We will felt our pumpkins with water and soap so it makes sense to do it on surfaces that don't get damaged by water. A kitchen table should be a good place once it's covered with a water resistant tablecloth. You won't need too much space. The amount of water you will use is minimal.
.jpg)
Take a piece of orange wool and form a ball in your hands. Water your wool and add some soap to it. Now gently squeeze the piece of wool a few times. Start rolling it between your palms. Keep rolling for 5 to 10 minutes adding water and soap if needed.

Once your ball has become somewhat firm and solid rinse it well and let it dry. The goal is to make the ball not too firm so that you will be able to get a needle through it once it's dry.

Once your orange ball is dry it's time to turn it into a pumpkin. Take a black thread and a needle. Start in the middle of the orange ball adding loops around it. Six loops should be OK. At the end it makes sense to add an extra loop to serve as a hanging thread.

It's an easy DIY project that produces a great result. You will have bright and cute pumpkins made of natural materials. They could serve as small Halloween gifts for your friends.

I had a chance to interview Vanessa Mccauley of Sweet Cheeks who lives in Richmond, VA and makes unique all-natural skin care products for adults and children.
.jpg)
How did you start?
Trial and error really. I found a recipe online to make body butter. It was okay but not great, so I tweaked it. Over time, I learned the balance. How to get the consistency of feel I wanted. I did it at home for years before I started selling it.

Why did you start?
It started with my son. He had terrible eczema. I tried all the drug store lotions the doctor told me to try to no avail. Finally the doctor wanted to put him on steroidal cream. That scared me. So I came home and started researching. I found out mineral oil is horrible for eczema. Every single cream the doctor recommended had mineral oil. So I set out to make a lotion for my son that would help.

Where do you make your items?
At home. However, our plan is to convert our detached garage into a workshop because Sweet Cheeks has taken over the house.

Where did you learn how to make your skin care products?
Partially online partially by making a lot of mistakes. Sadly, often I had to find out lots of what did NOT work to get to what did. My solid lotion bar probably saw 10-15 fails before I ever got it close to what I wanted. Then it was just small tweaks. However, I suspect now, it is even easier to find recipes and instructional videos on the web.

Is it hard to find a good supplier of the ingredients?
For the most part I have one supplier I use for most of my raw ingredients that I love. The quality of what I get is amazing, they are easy to work with, and have a good supply. The thing I have the biggest issue with is essential oil. The price can fluctuate greatly sometimes as can the quality. So I stick with a supplier that has a very consistent quality but that limits the oils I have access to. There are other oils I would love to work with but have not found a supplier that can give me a consistency that I need. I would love if there was a local shop that I could smell the oils that also allowed me to purchase in bulk.

Did you have to obtain any certificates? No and no. I vacillate on regulating the beauty industry. On one hand, what goes into products that go on your skin is so important. Companies have been allowed to put toxic things in products for too long. On the other hand I don't know if regulation will do more to protect consumers than what the FDA's organic labeling did. It is a cost prohibitive stamp that is impracticable for small farms and does little to really produce the cleaner farming practices consumers want. So I don't know what the answer is other then, know the company. What are the company values? Are they transparent in their practices. Look at ingredients. Contact them with questions. A good company should always be thrilled to tell you why they did what they do and how.
Where do you sell your products ?
I sell on line and at local shops. My products are available at a few Local Richmond shops such as Nest Antiques, Re Funk It and Orange.


